Are you decorating today? This weekend? Because, it is “officially” acceptable to decorate for Christmas now! I’m not sure who came up with the rule that decorations cannot go up until the day after Thanksgiving, but nevertheless… the time has come!
Every year I get so many questions about the Christmas tree – Do you make the tree topper? Can you buy it? How do you decorate with mesh? Ribbon? How many ornaments do you use? So, this year, I thought I would explain the step-by-step process of how I decorate a Christmas tree. 🎄
The first thing I always ask my clients is if they have a fake tree or if they are getting a real tree. This matters more than people think. In my opinion, a real tree cannot hold up like an artificial tree. I can decorate your real tree, but your branches will eventually sag and thus your decorations will look like Christmas has melted. So, I always recommend investing in an artificial PRE-LIT tree (and a good pine scented candle, if that’s what you’re missing). I found the best deals on pre-lit trees on Amazon!
Next, I always like to have a theme in mind. Traditional? Elegant? This year, all the rage is farmhouse and all things white. I, myself, love traditional red and green Christmas colors. Some of my clients like to base their decorations around a theme like candy canes or snowmen, and we work off of that. Or maybe you can’t decide and we do a different theme in each room! 😉
Let’s trim the tree!
Grab your step stool! I’m hoping you have a pre-lit tree so that we can get right to the fun stuff. If not, I usually use one strand of 100 lights for every one foot of tree. Now, let’s start with the tree topper. It is what draws the most attention. I always use a playful piece right at the top to play off of (ie. star, snowman hat, present). It doesn’t have to be centered (I actually prefer it not to be centered). I found this oversized snowflake at Tai Pan Trading Company about 5 years ago and I haven’t been able to part with it. It has been my topper focal piece ever since.

Next, I start adding my sprays. When shopping for sprays, unless there are some that are a MUST have, try to find the ones with a longer stick. These work best for the tree. I do have a few with a shorter stick that I had to have, but generally these are for wreaths and garlands. Now, this part is personal preference and mine changes every year. Some years I go heavy on the topper, other years I save some of my spiral and berry sticks to give a little extra love to the rest of the tree. I always start at the top and work my way down about 18 inches, interchanging colors and styles. For the topper, I generally use about 20-30 sprays. When my topper, spirals, berries, and branches are placed, I add a few final touches to the top. I found these super fun Christmas light sticks at Hobby Lobby and these Ho Ho Ho sticks at Pier 1 Imports.
*Yay! The top is done! On to the mesh.*


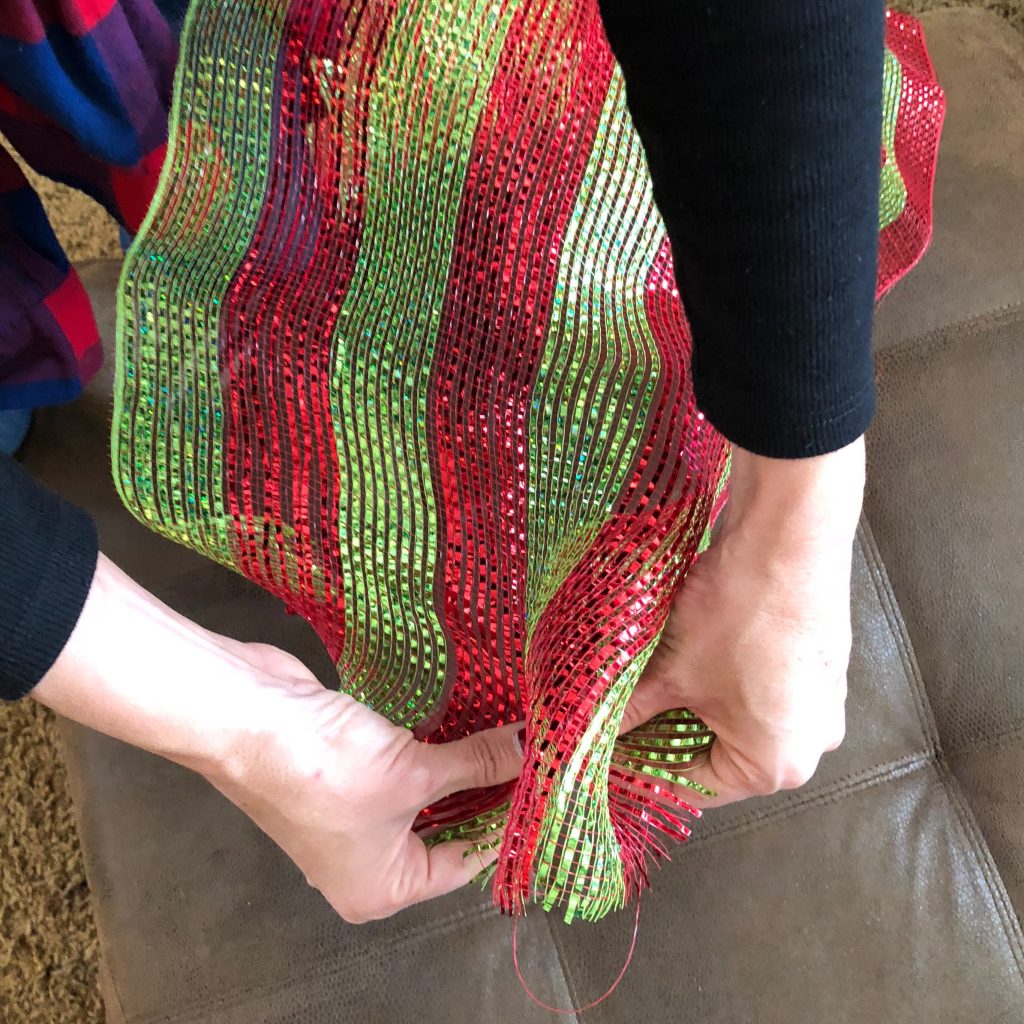
This is the most time consuming part of the decorating. If you have never used mesh before, be prepared to wad it up in a big ball and throw it on the ground the first time. But come back, after a spiced eggnog, and try again. And when you do here are a few tips to help: First of all, I only ever use only 21” deco mesh. This is where the artificial tree is really helpful!
- Unroll the mesh about 2 feet and grab the end with both hands.
- Make a fold in the middle (top facing out).
- Make 2 more accordion style folds, so it’s folded in between your fingers.
- Take that fold (don’t let it go) up the step ladder, to the top of the tree. Let the rest of the roll unravel down the tree.
- Find a long branch, underneath your topper, to use as a “tie”.
- Stick the fold into the tree and twist the branch around the fold. Make sure it’s secure.
- Grab about 12” down (depending on how big or small you want your “bubble”).
- Repeat the process; folding the material in half, creating an accordion fold, stick it in to the tree, and secure with a branch.
- Continue your bubble all the way down the tree and start back at the top again.


Adding ribbon on top of the mesh adds an extra level of flare. I try to use ribbon at least 3 1/2 inches, or wider. Lay the ribbon on top of the mesh and incorporate it in to your accordion fold. As you work your way down the tree, youll need to shift the ribbon, to keep it lined up with the mesh.
After my mesh is finished (I usually do 4-5 strands) I add my extra “fluff”. Some years it is bows, some years it is ribbon, and some years I leave it with just the mesh. This year I went with bows. There is no rhyme or reason to the placement of the bows, just that they are evenly spaced and, if you are using more than one type of material, that they alternate as best as possible.
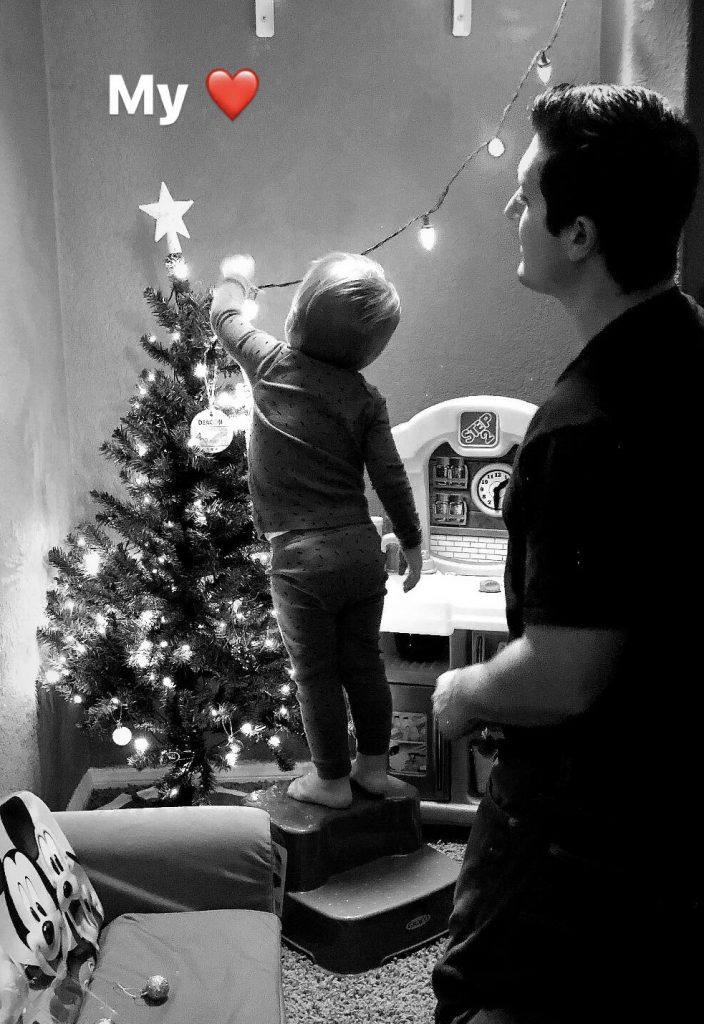
Lastly, and my most favorite part… the bulbs and ornaments – and any extra sprays you have leftover from the top! This part the family can help with (or maybe they can’t. 😂) I SWORE when I started decorating that I would NEVER let my children touch my tree. I was too much of a perfectionist for that. But, when my son went in to the other room to grab his mini step stool, sat it down next to me while I was on my step stool, and grabbed a bulb to hang, my heart exploded and I let him hang all the ornaments that his sweet little hands could reach. ❤️ But, let’s be honest, I am still too particular with my decorations. So, when that sweet boy went to sleep I may have moved a few (most all) of them, and he got his very own tree for his playroom to decorate the next day. And that is where all of his Buzz Lightyear and Lightning McQueen ornaments will go, along with all of his preschool popsicle-stick-frame Christmas present ornaments (bless all the children’s hearts!)


Love it!